Do you want to know how to make slides on Pinterest?
Pinterest is a wonderful way to share your favorite pictures with a large audience.
It is easy to create slideshows on Pinterest, but not everyone knows how to do it.
In this article, you’ll learn how to make slides on Pinterest in five easy steps.
How To Make Slides On Pinterest

To make slides on Pinterest, go to Pinterest.com and sign in to your Pinterest account.
Make sure you have a Pinterest Business account; otherwise, you won’t be able to upload multiple images to your slide.
After you sign in, click on “Create” from the top menu and then select “Create Pin” from the dropdown menu.
Now, select all the images and drag and drop them into Pinterest.
Choose “Create a carousel” and click on the “Create Pin” button. Click on the “Reorder” icon to change the order of the slides.
Give your slide a name, add a description, add a destination link, and select the board.
Finally, click on the “Publish” button to publish your Pinterest slide.
Note: You cannot make Pinterest slides on the mobile app. You’ll have to use the desktop version of Pinterest.
Here’s what a Pinterest slide looks like: https://pin.it/boTca5Q
Here’s how to make slides on Pinterest:
- Click on “Create” and then on “Create Pin”
- Select the images and drop them on Pinterest
- Choose “Create carousel” and click on the “Create Pin” button
- Add a title, description, alt text, and destination link
- Select a board and click “Publish”
1. Click on “Create” and then on “Create Pin”

The first step is to go to Pinterest.com and log in to your Pinterest account.
Now, make sure you have a Pinterest Business account.
If you don’t have a Pinterest Business account, then click on the down arrow located in the top right corner next to your profile picture and select “Convert to business” and then click on the “Upgrade button”.
After you have a business account, simply click on the “Create” button from the top menu.
You’ll see three options in the drop-down menu: Create Idea Pin, Create Pin, and Ads.
Select “Create Idea Pin” if you want to create pins like Instagram stories.
You can also create ads to promote your products or pins.
Select “Create Pin” from the drop-down menu if you want to create general pins or slides.
2. Select the images and drop them on Pinterest
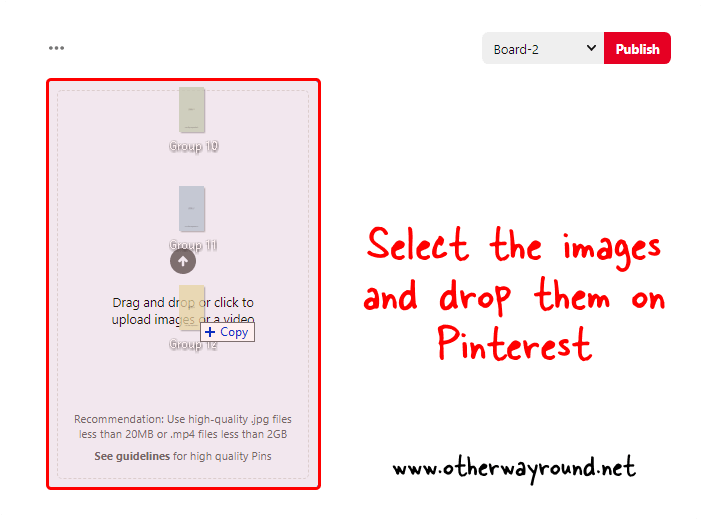
Now, select all the images you want to upload. You cannot upload images one by one.
So select all the images you want to upload to Pinterest. After selecting, drag and drop them onto Pinterest.
Don’t worry about the sequence; you can rearrange the slides later.
3. Choose “Create carousel” and click on the “Create Pin” button
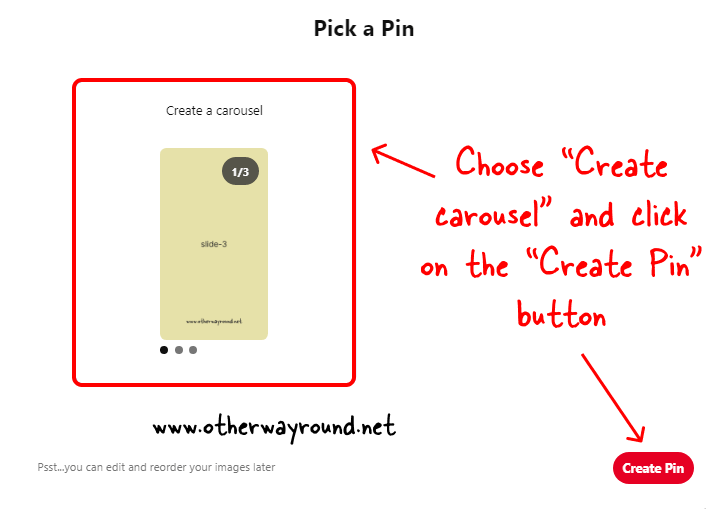
Choose “Create a carousel” to create a Pinterest slide. You can also choose “Create a collage” if you are interested in creating a Pinterest collage.
Now, click on the “Create Pin” button and proceed to the next step.
4. Add a title, description, alt text, and destination link
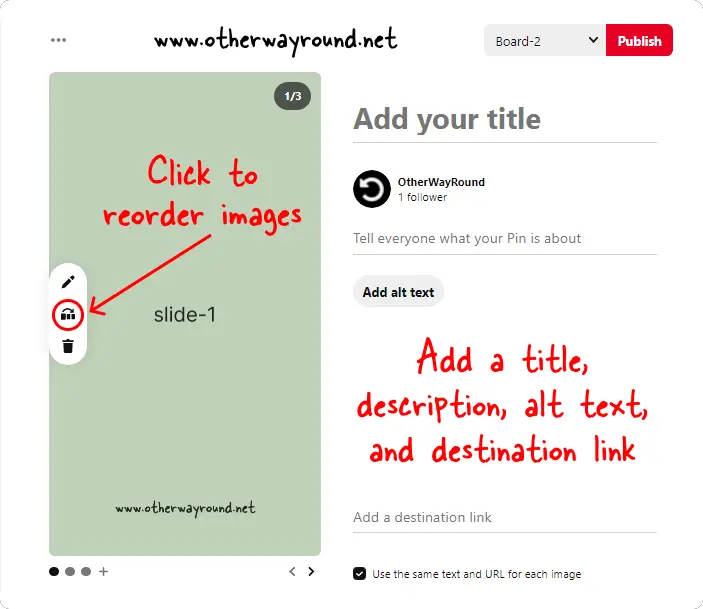
You can click on the “Reorder” icon to reorder images in the slide.
Now, add a title to the slide. Make sure it is short.
Describe the slide in the description box. It is important to add keywords in the description box.
Explain the slides in detail in the “Alt text” section.
Paste a destination URL for the slide. You also have the option of adding a different URL for each slide.
5. Select a board and click “Publish”
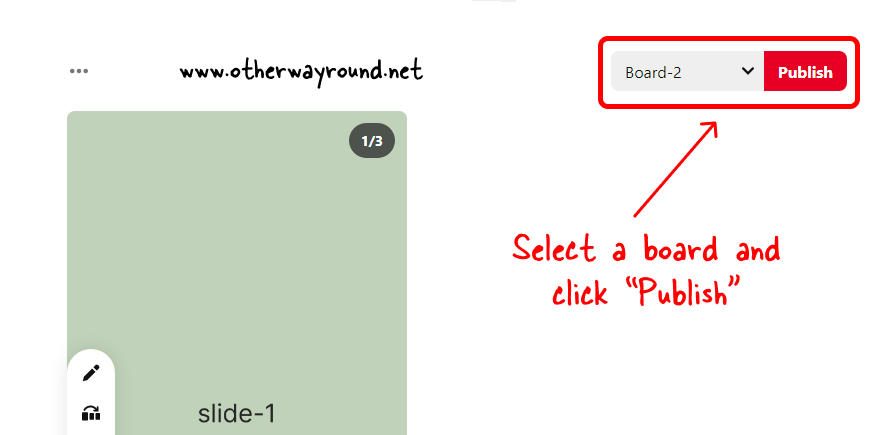
Now, select a board from the drop-down list next to the “Publish” button.
Select “Create board” if you want to create a new Pinterest board. You can also create a secret Pinterest board to keep the slides and all the images private.
Finally, click on the “Publish” button to publish your Pinterest slide.
Congratulations! You have successfully learned how to make slides on Pinterest.
Conclusion
We hope you enjoyed our blog post on how to make Pinterest slides. By taking some time to find inspiring images, edit your photo, and share it with your followers as a slide, you will be able to increase your reach and get more people to follow your account.
If you would like to check out some other Pinterest blog posts, check out this page.

