Do you want to know how to remove category on Instagram?
A category label appears directly below your Instagram name and assists visitors in understanding the type of business you have.
However, if you switched your personal account to a business account primarily to have access to the additional features and have no business to promote, displaying a category label below your name is unnecessary.
Is it possible to remove the category label on Instagram?
The short answer to that question is “YES!”
If you have a business or a creator account on Instagram and want to remove the category label from your profile page, then follow these four simple steps.
Choose Platform
How To Remove Category On Instagram?
To remove category on Instagram, open the Instagram app and tap the profile icon from the bottom menu. Now, tap the “Edit Profile” button. Scroll down and select “Profile display.” Finally, turn off the “Display category label” toggle switch and tap “Done”
Here’s how to remove category on the Instagram mobile app:
- Tap the profile icon
- Tap the “Edit Profile” button
- Select “Profile display”
- Turn off the “Display category label” toggle switch and tap “Done”
1. Tap the profile icon
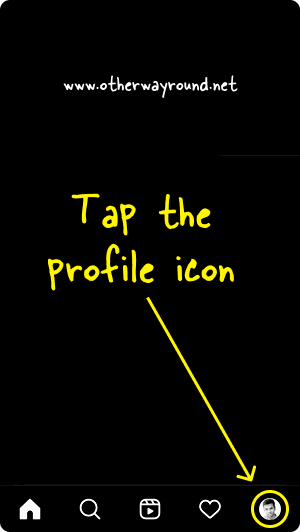
To begin with, go to your Instagram profile page.
Launch the Instagram mobile app and sign in to your Instagram account to get started.
You’ll notice a profile icon in the bottom right corner after you log in.
To open your Instagram profile page, tap on the profile icon.
2. Tap the “Edit Profile” button
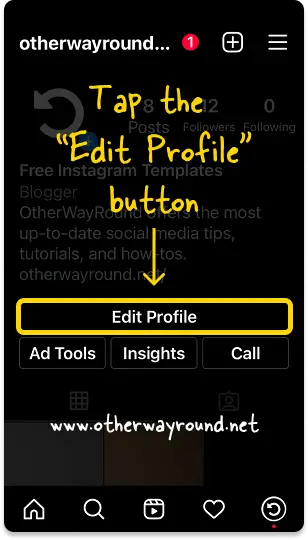
The profile page displays your profile photo, bio, and Instagram posts.
You’ll see three buttons below the bio: Edit Profile, Ad Tools, and Insights.
Tap the “Edit Profile” button to see the profile options you can change.
3. Select “Profile display”
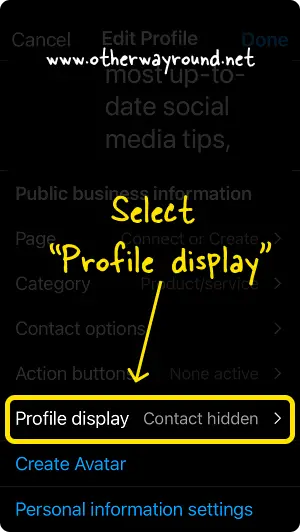
You can edit your profile, Instagram username, name, bio, website URL, contact options, category, and action buttons here.
The “Profile display” option is just below the “Action buttons” option.
Select the “Profile display” option and proceed to the next step.
4. Turn off the “Display category label” toggle switch and tap “Done”
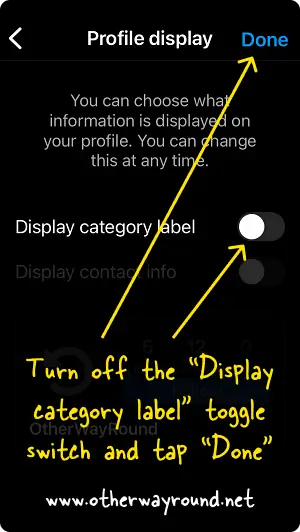
There are two toggle switches in the “Profile display” setting: Display category label and Display contact info.
To remove the category label from your Instagram profile, turn off the “Display category label” toggle button.
Finally, tap “Done” to save the changes.
Congratulations! You’ve successfully learned how to remove category on Instagram.
How To Remove Category On Instagram web?
To remove category on Instagram web, go to Instagram.com and sign in to your Instagram account. Now, in the top menu, click the profile icon. Click the “Edit profile” button. Choose “Professional Account” from the left menu. Finally, uncheck the “Display category label” check box and click “Submit”.
Here’s how to remove category on Instagram web:
- Go to Instagram.com and sign in to your account
- Click on the “Profile” icon
- Click the “Edit profile” button
- Select “Professional Account” from the left menu
- Uncheck the “Display category label” check box and click “Submit”
1. Go to Instagram.com and sign in to your account
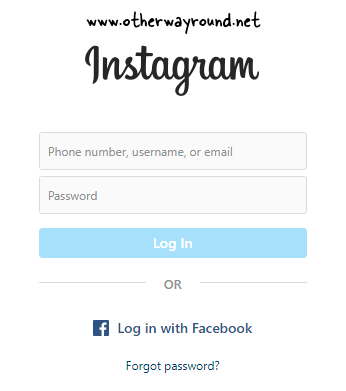
The first step is to open a desktop browser and go to Instagram.com.
After visiting Instagram.com, enter your registered email address and password, and then click the “Log In” button.
If you’ve linked your Instagram and Facebook accounts, you can sign in with your Facebook account.
Click the “Log in with Facebook” button to log in using your Facebook account.
2. Click on the “Profile” icon
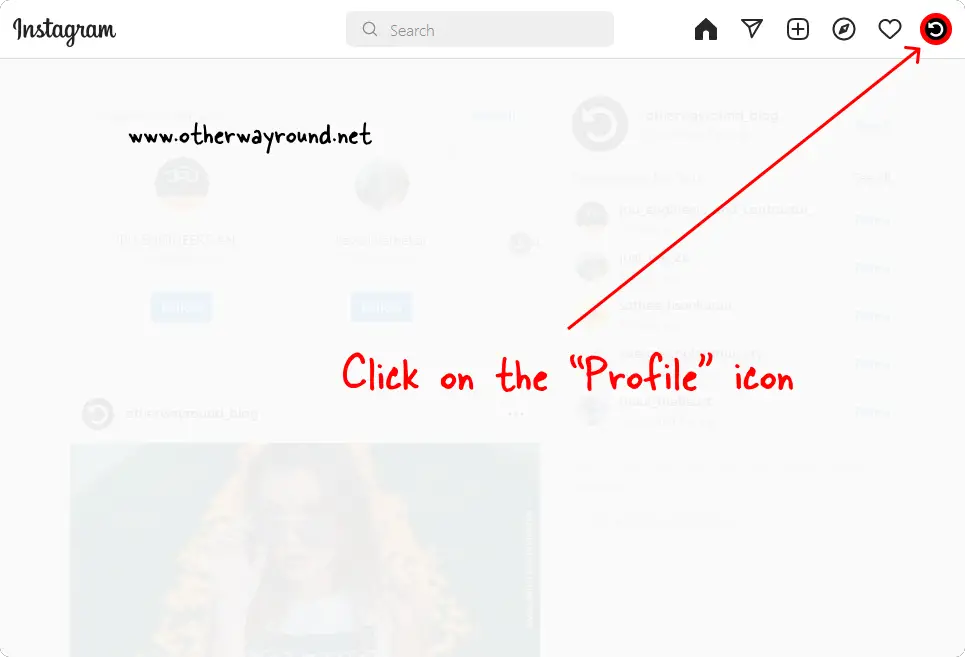
After you log in to your Instagram account, you’ll notice six icons in the upper right corner: Home, Message, Add, Discover, Notification, and Profile.
To access your Instagram profile page, click the “Profile” icon.
3. Click the “Edit profile” button
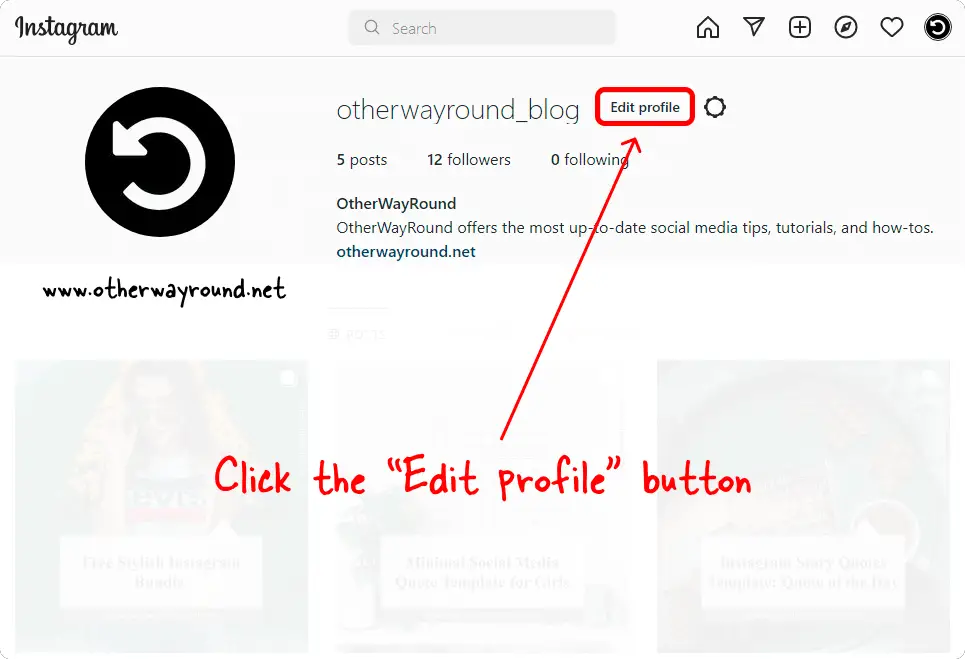
The “Edit profile” button is located on your Instagram profile page, just next to your username.
To make changes to your Instagram profile, click the “Edit profile” button.
4. Select “Professional Account” from the left menu
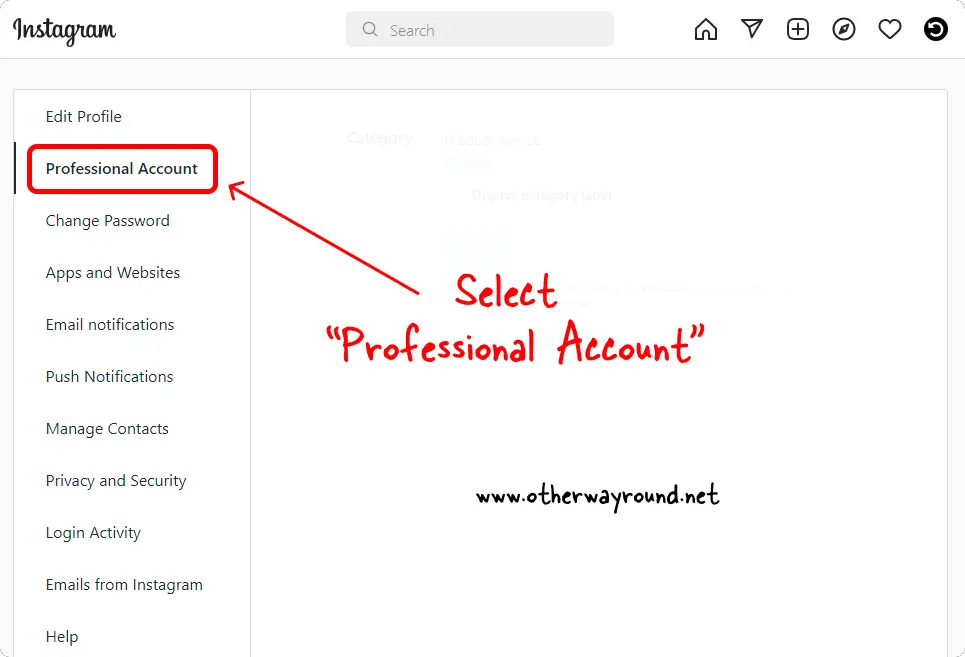
On this page, you’ll see a menu on the left side.
Select the “Professional Account” option from the list of options and proceed to the next step.
5. Uncheck the “Display category label” check box and click “Submit”
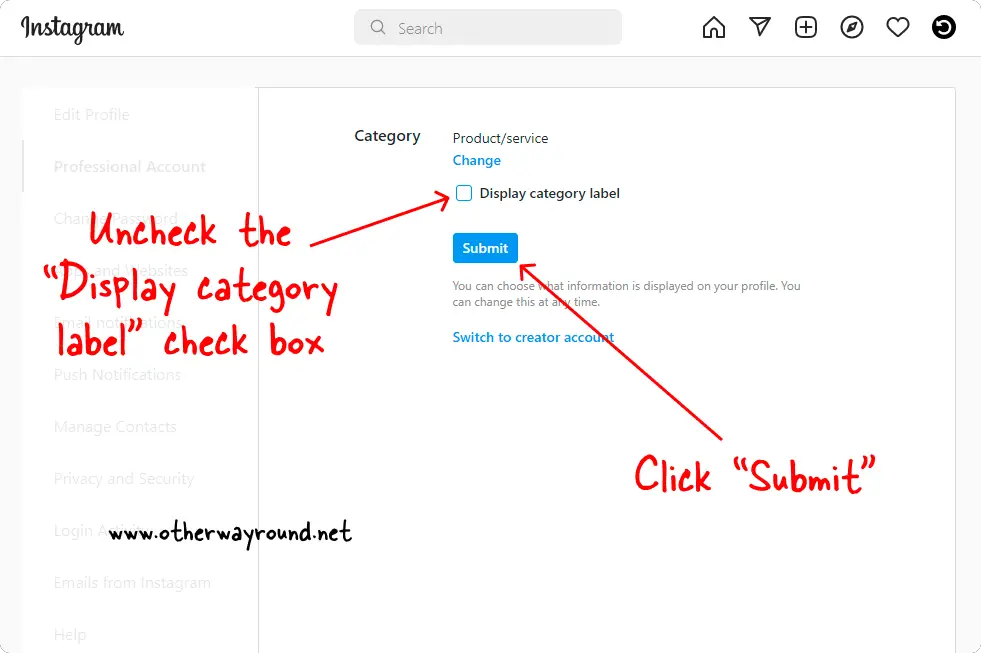
On this page, you’ll see the “Display category label” check box.
To remove the category label from your Instagram profile, uncheck the “Display category label” check box.
Finally, click the “Submit” button to save the changes.
How To Remove The Business Category On Instagram?
To remove the business category on Instagram, open the Instagram mobile app and tap on the “Profile icon” from the bottom menu. Tap the “Edit Profile” button and select “Profile display” from the list of options. Disable the “Display category label” switch and tap “Done”.
Conclusion
Category labels are a great way to let your customers know what type of business you have.
However, having a label on your Instagram personal profile makes no sense and can be rather frustrating because the category list does not include the “None” option.
Fortunately, there is a simple solution.
To remove the category label from your Instagram profile, follow these four simple steps:
- Open the Instagram app
- Tap the profile icon
- Tap the “Edit Profile” button
- Select “Profile display”
- Turn off the “Display category label” toggle switch and tap “Done”

