Do you want to host a private live stream on YouTube?
YouTube Live is a fantastic tool for entrepreneurs, gamers, and social streamers to collaborate and share their content.
The problem is that setting up a private live stream on YouTube isn’t straightforward.
If you’re having trouble figuring out how to privately live stream on YouTube, you’ve come to the right place.
In this article, you’ll learn how to host a private live stream on YouTube.
How to Host a Private Live Stream on YouTube
To start a private live stream on YouTube, click “Go live” and then “Start”. Select a webcam or streaming software. Now insert the details and description. Select “Private” in the “Visibility” area and enter the recipients’ emails. Click “Go Live” to begin.
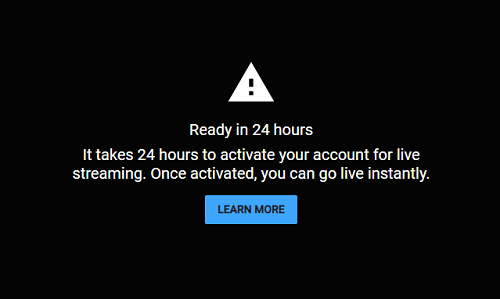
To begin, you must activate the live stream option. YouTube will activate the live stream feature on your account in 24 hours.
Here’s how you can host a private live stream on YouTube:
- Click on the “Go live” button
- Select when you want to go live
- Pick the type of stream
- Enter the Title, Description, and Category
- Customize the stream
- Enter the emails of invitees
- Click on the “GO LIVE” button
1. Click on the “Go live” button
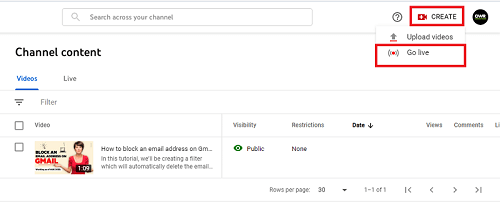
Once the “live stream” feature is activated for your account, go to YouTube Studio and click on the “Create” button located on the top right of the screen.
Now click on the “Go live” button.
You won’t directly go live on YouTube; you’ll have to first step up and customize the stream.
2. Select when you want to go live
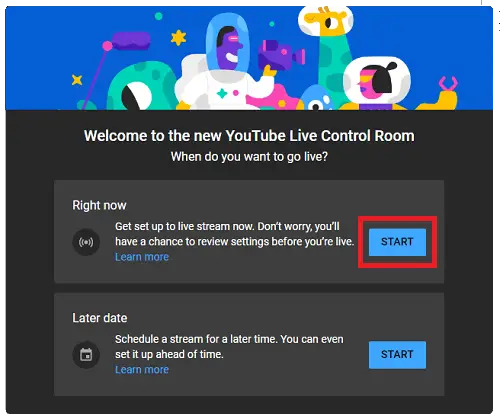
This is an excellent feature that allows you to schedule a live stream. You can also select to go live immediately.
In this guide, we’ll select to go live immediately.
So, click on the “START” button in the “Right now” section and proceed to the next step.
3. Pick the type of stream
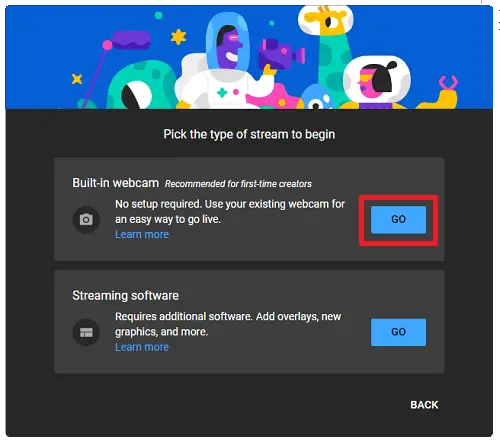
In this step, you have to select the type of stream you want to host.
If you are a beginner, it is recommended that you use the built-in webcam and microphone.
If you want to use streaming software like OBS, you can select the second option.
4. Enter the Title, Description, and Category
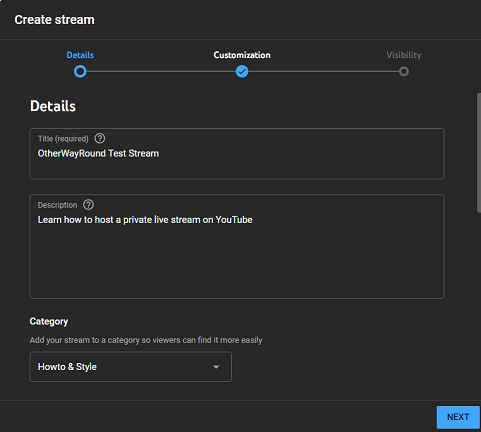
Give a short title to the live stream and describe the live stream in the “Description” section.
Now, select a suitable category from the list.
5. Customize the stream
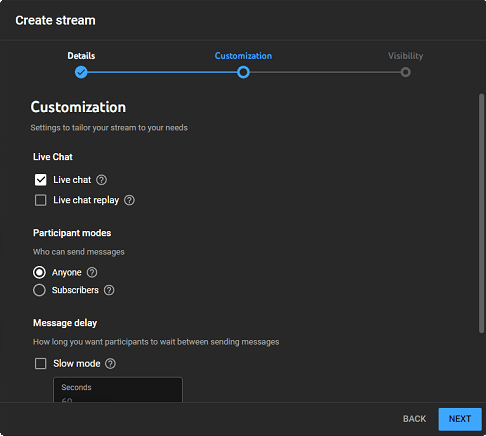
In this section, you can customize your stream.
You can enable or disable live chats, decide who can send messages, and how long you want your viewers to wait between sending messages.
Click on the “Next” button to edit the “Visibility” settings.
6. Enter the emails of invitees
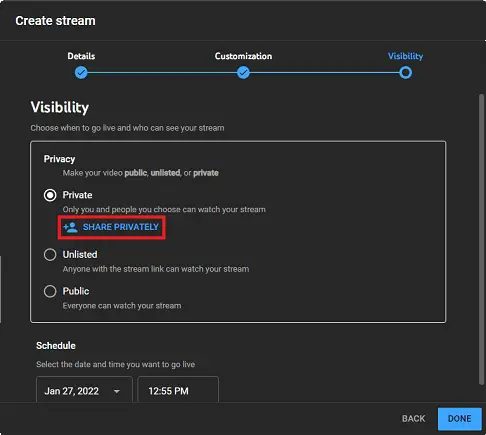
Since we will keep this stream private, select “Private” from the list.
Now click on “Share Privately” and enter the emails of the people you want to share the live stream with. Check the “Notify via email” box if you want to notify them via email.
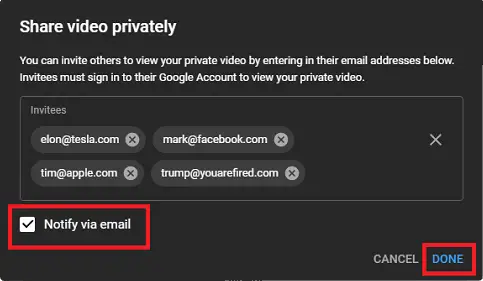
YouTube will automatically notify the participants when the stream is live.
You can also schedule the live stream by selecting the date and time. Leave it as it is if you want to go live immediately.
Click on the “Next” button.
7. Click on the “GO LIVE” button
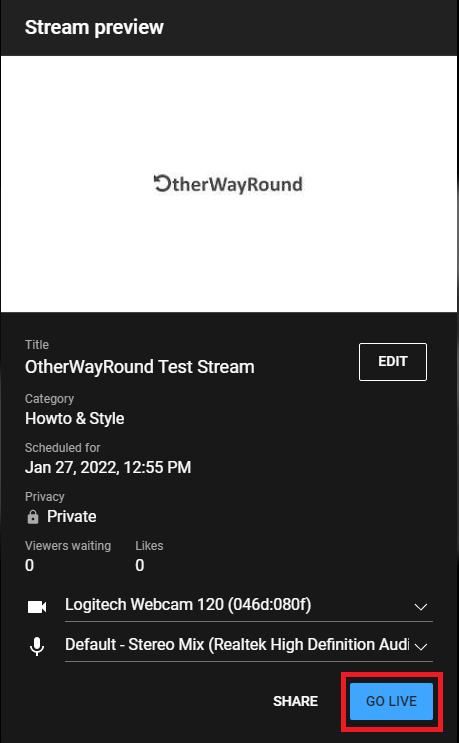
This is the final step, so make sure everything is okay and you are ready for the live stream.
Finally, click on the “GO LIVE” button to start the live stream.
All the participants will now be notified via email.
You have now successfully learned how to host a private live stream on YouTube.
What is private live stream YouTube?
YouTube’s private live stream feature enables creators to connect with their audience in real-time. Because the stream is private, you can select the participants with whom to share it.
Can you do private live streams on YouTube?
Yes, you can do private live streams on YouTube. To do so, click “Go live” and then “Start” to start. Choose a webcam or software that lets you stream. Now, add the details and the description. Private is what you want to choose in the “Visibility” area. Then, type in each recipient’s email address. To start, click “Go Live.”

