Do you want to know how to make a section into a board on Pinterest?
Pinterest provides an appealing platform to share your interests with friends and family. You can organize your interests in various different ways using Pinterest boards.
You can further divide Pinterest boards into sections so that it is easy for users to navigate and find what they are looking for.
Follow this step-by-step guide on how to make a section into a board on Pinterest. We’ve also included screenshots for both the Pinterest web and the Pinterest mobile app.

Choose Platform
How To Make A Section Into A Board On Pinterest (Web)
To make a section into a board on Pinterest (web), open the Pinterest board and click on the “+” icon located at the bottom of the screen.
Now, select “Section” from the list, give the board section a name and click on the “Add” button.
To move the pins to the section, click on the “Organize” icon and select all the pins you want to move to the section. Now, click on the first icon located at the bottom of the page that says “Move” and select the section.
Here’s how to make a section into a board on Pinterest (Web):
- Open the board
- Click on the “+” icon
- Select “Section”
- Enter the section name and click on “Add”
- Move the pins to the section
1. Open the board
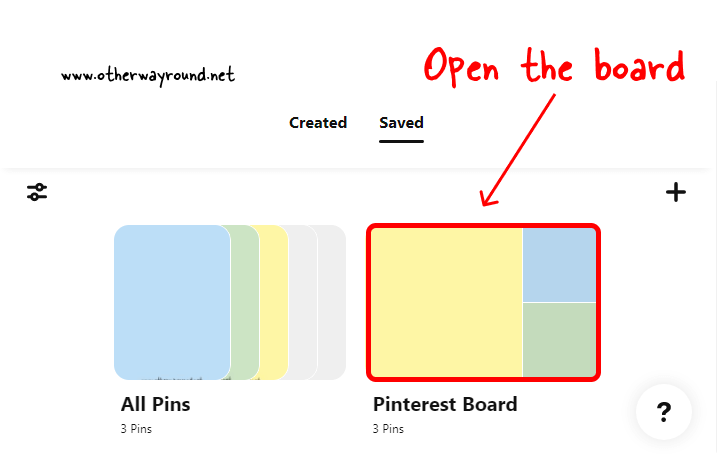
The first step is to go to Pinterest.com and log in to your Pinterest account. After you log in, it is time to open the Pinterest board.
To open the Pinterest board, click on your profile icon located in the top right corner.
Now select the “Saved” tab to see all your Pinterest boards. If you don’t have a Pinterest board, then read this guide to learn how to create a board on Pinterest.
2. Click on the “+” icon
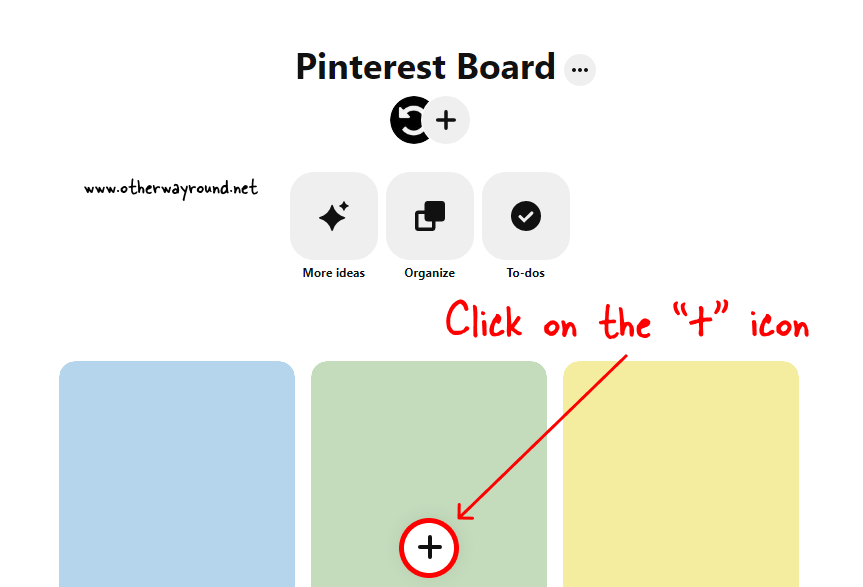
After you open your Pinterest board, you need to click on the floating “+” icon at the bottom of the screen.
The icon should be at the bottom of the screen, exactly in the center.
3. Select “Section”
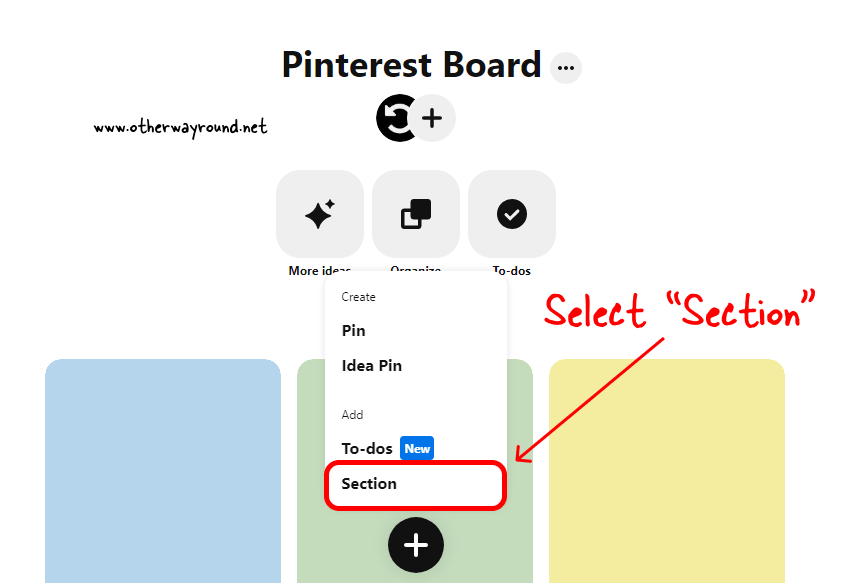
After you click on the “+” icon, you’ll see a list of options with two categories: Create and Add
In the “Create” category, you’ll see options like “Pin” and “Idea Pin”, and in “Add”, you’ll see “To-dos” and “Sections”.
Select “Section” from the list to create a section.
4. Enter the section name and click on “Add”
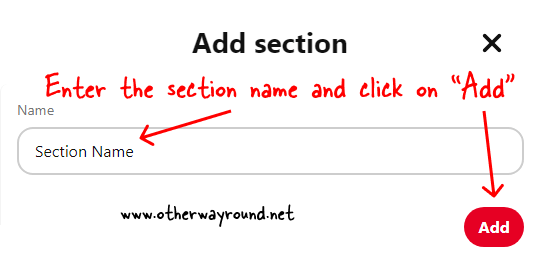
Now, it is time to give your board section a name. Click in the “Name” field and start entering the section name.
After you enter the name, click on the “Add” button.
5. Move the pins to the section
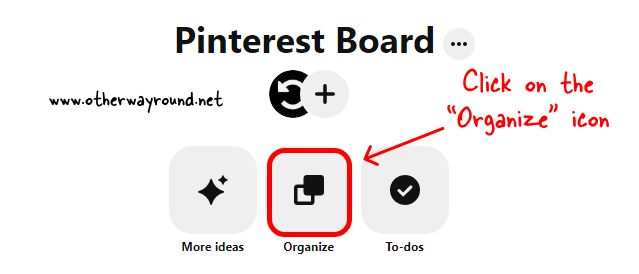
Congratulations! You have successfully learned how to create a section on Pinterest boards. If you want to move the pins in the board to the section you just created, click on the “Organize” icon.
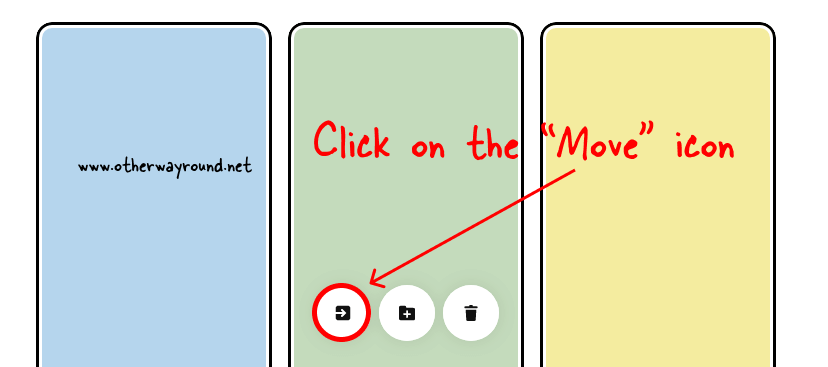
Now, scroll down and select all the pins you want to move to the newly created section and click on the “Move” icon. Finally, select the section name from the list to move the pins.
How To Make A Section Into A Board On Pinterest (Mobile App)
To make a section into a board on Pinterest (Mobile App), open the board and tap on the floating “+” icon located at the bottom of the screen.
Now, select “Section” from the list, give your board section a name, and tap on the “Next” button. Finally, select all the pins you want to move to the section and tap on the “Done” button.
Here’s how to make a section into a board on Pinterest (Mobile App):
- Open the board
- Tap on the “+” icon
- Select “Section”
- Enter the board name and tap “Next”
- Move your Pins to the section
1. Open the board
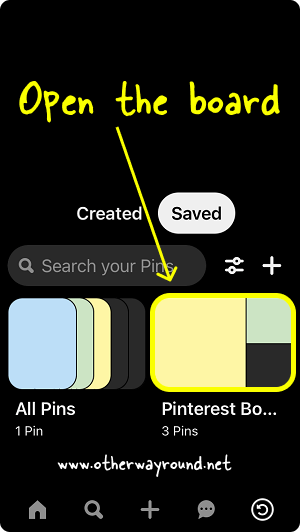
The first step is to launch the Pinterest mobile app and log in to your Pinterest account. It is now time to open the Pinterest board.
To open your Pinterest board on the Pinterest app, tap on the profile icon located in the bottom right corner of the screen.
Now, scroll down and make sure the “Saved” tab is selected. Finally, tap on any board to open it.
2. Tap on the “+” icon
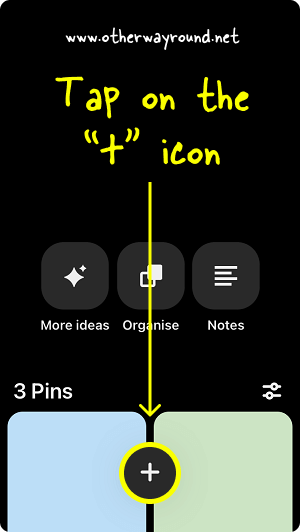
After you open the Pinterest board on the mobile app, tap on the floating “+” icon at the bottom of the screen.
3. Select “Section”
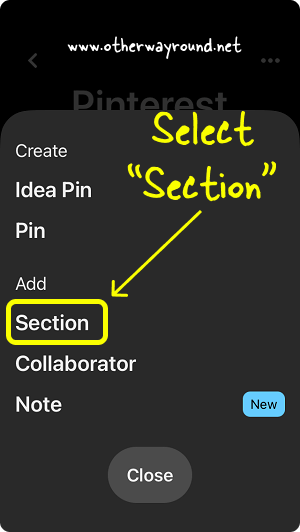
After you tap on the “+” icon, you’ll see options like “Idea Pin”, “Pin”, “Section”, “Collaborator”, and “Note”
Select “Section” from the list and proceed to the next step.
4. Enter the board name and tap “Next”
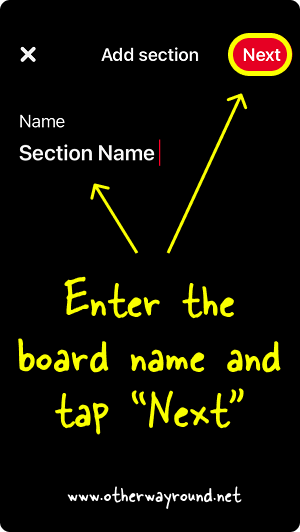
It is time to give your Pinterest board a name. Tap on the “Name” field and start entering the board name or pick one from the suggested names.
Now, tap on the “Next” button on the top right. Sometimes, you may see the “Done” button on the top right. Tap on whichever button you see in the top right and proceed to the next step.
5. Move your Pins to the section
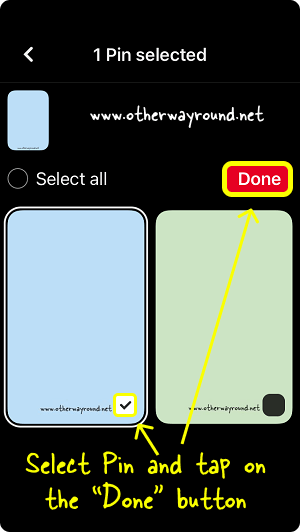
The final step is to move your Pins to the newly created section. You can also add new pins to this section.
After you tap on the “Next” button, select all the pins you want to move to the section. Tap on the “Select all” radio button to select all the pins.
Finally, tap on the “Done” button.
You can also move the pins by opening the Pinterest board, tapping on the “Organize” icon, selecting the pins you want to move, and clicking on the first icon at the bottom of the page that says “Move”. Finally, select the board followed by the section.
Conclusion
We hope you enjoyed our blog about how to make sections on Pinterest boards. Pinterest boards can be a great way to show off content that your audience might be interested in, but you might feel like you want to break them up into sections. There are a few different ways you can do this, with this blog post, we will show you the simplest way to accomplish this.

